
Earlier this fall, I read this post on the blog Buggy for First about portable word walls and loved the idea. It's saves a ton of space, and students can take the words with them to their seats to use, then return to the wall.

However, I also thought it would be fun to "tech up" this idea by adding an interactive component to it. Using Seesaw, I could attach QR codes to the back of each word card. When the students scan the QR code, they see a video of the word being read and spelled. Seesaw, I love you! Keep reading for detailed instructions on how I made these. If you'd like to download the QR codes for the words that I created, you can CLICK HERE.


The words on her wall currently are the high frequency words from the first three weeks of the 1st grade Wonders curriculum.
There are some cute FREE alphabet cards on Teachers Pay Teachers from Babbling Abby. Click the image below to download this freebie.
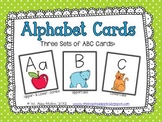
There are some cute FREE alphabet cards on Teachers Pay Teachers from Babbling Abby. Click the image below to download this freebie.
To create the QR codes for each word, I first took a screen shot of each word card from her Power Point. The screen shots all saved to my desktop as images, which I drug into a folder in my Google Drive. To do this activity in Seesaw, I wanted to use the record while you draw feature, which only works from a mobile device. The free Google Drive app was very helpful in allowing me to easily access these images.

From the Google Drive app on my iPad, I could tap each image and then choose "save to photos". All of the word card images were now saved to my iPad. Wahoo!
I then opened the Seesaw app and logged into my teacher account. Since I wanted to create these QR codes for use in this class, as well as future classes, I created a new class to store these in. That way they are not tied to my current year's Seesaw journal and can easily be used again. I also went into my class settings, and under "Manage Class" I selected "Manage Folders". I created a new folder called "HFW" to store all of these videos in. I also made sure that in the "Show add to folder step" option, "teachers" was selected. This will make printing them in bulk much easier.

To begin, I selected "camera roll" and chose the first word I wanted to use.

I then opened the Drawing tool in Seesaw by selected the pencil, and clicked the "record" button so it would record while I drew.

I recorded each word by saying the word, spelling the word, then saying the word again, using the pen to underline each letter and then the whole word. Here is an example (please don't be intimidated by my amazingly professional sounding voice hahaha):
Once I was finished recording, I selected the green checkmark to process the video. I don't need to select "everyone" or any students' names ... I just click the green checkmark.

I then selected the folder that I would like this recording to go into.

And this is what it looks like when processed.

I did this for each word - for around 30 words, I think it took me a half hour. To print, I selected folder view and then the folder that I put them all in.

Once I was in the HFW folder, I selected "print PDF". This places all of the items in this folder into one PDF document that is printable and includes a QR code!

Once the document printed, I cut out each QR code and glued to the back of the appropriate word card. The students can now use a QR scanner or the QR scanner from inside Seesaw (find it by clicking the icon at the top, then selected the QR code icon).


For future words, as students get comfortable with using Seesaw, it would be great to have them record the word videos for each word and create their own word wall. They could use an image or use the draw while record feature to write each word as they spell it, like this:
My mind is officially blown. Wow. That's all. Wow. Amazing work.
ReplyDeleteAww! Thank you! I'm glad you like the idea ... and it was so easy with Seesaw! :)
DeleteI think this is the COOLEST idea! I recently started using Seesaw in my classroom and feel like I am finally getting the hang of it, so I am so excited to make my own interactive word wall. Thank you for the detailed description on how to make it. I feel like maybe if my students get to scan QR codes to listen to the words, they will be more motivated to actually use the word wall as a resource. Thanks so much for sharing this awesome idea! :)
ReplyDeleteThank you so much! I am so glad you liked this idea, and found the detailed instructions helpful. :) Seesaw is the best!!
DeleteI am also new to Seesaw and enjoying following along with you in your journey. I am having problems downloading the QR codes you created for the sight words. Thanks also for the instructions in adding to my sight words.
ReplyDeleteI fixed the link to the QR codes I have made - thanks for letting me know there was a problem with it. Glad you enjoyed the post!
Delete